
GIF Evaluation
For our current brief we have been set a task to create a GIF using our hand drawn praxinoscope designs. The GIF had to be hand drawn as this shows multiple techniques and ways an animation can be created. Another requirement of this task was that the praxinoscope had to be edited on Photoshop, allowing me to change the appearance to suit the style of animation I wanted to create.
To download my hand drawn animation onto the computer, I scanned my drawing using a photocopier. I made sure all settings were correct, as I was downloading an A3 sized piece, and clicked to download to email. I changed the format to a JPEG which allowed it to successfully open in photoshop.
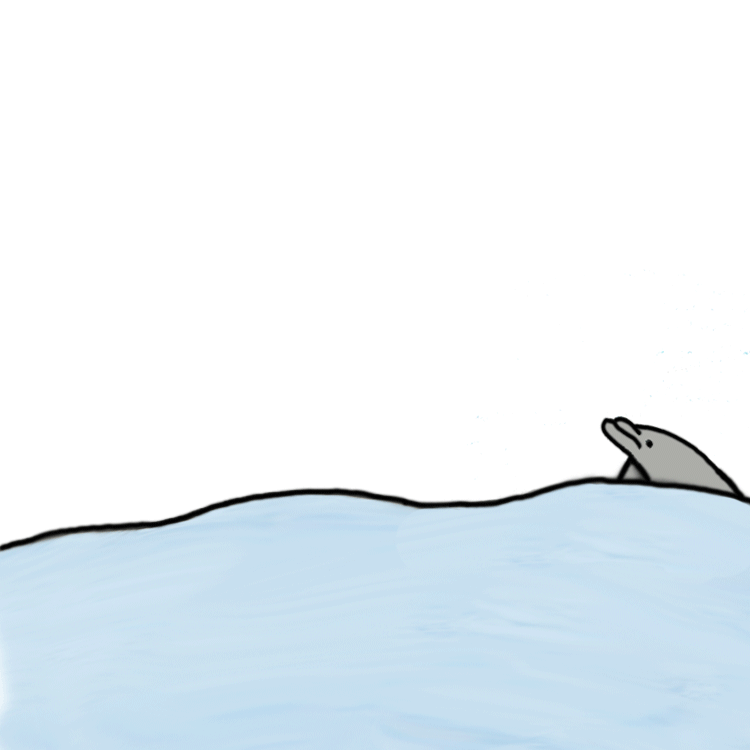
Once my image was successfully downloaded I began to edit it. I copied my initial layer and locked it allowing me to go back if I needed to. I used many tools to edit my praxinoscope, the first being a magic brush tool which allowed me to erase any pencil marks still showing in the background. Once I had removed them I started working on editing the design. I decided to go for a cartoon style using block colour as it allowed a smaller margin for error. I started with the dolphins, using a paint bucket tool to completely fill them with a grey colour. I then went round the outlines with a black brush tool to neaten up the edges. I then used this same method on the droplets of water.
When photo shopping the water I tried to keep the waves noticeable. I copied the colour of my water and used a paint bucket tool to create an even shade, however decreased the opacity to make it seem more like water. I then focused on the waves with a smudge tool to try remove the harsh lines. I decided to then use the smudge tool all over the water as I felt the waves and water didn't blend well. I noticed while doing this that there were some small, darker marks on the water. To fix this I decided to use a spot healing tool which easily took them away. I then used the same technique with the brush tool to outline the edge of the water in black, which allowed a more cartoon effect.
To create the GIF I had to flatten the image/layers I had just created and then create a web file. The web file was required to be 270x270 pixels and have a 72 dots per inch. This exact web file would allow for a successful GIF animation. I went back to my photo shopped praxinoscope and used a marquee tool to select each section and paste into the new document. Each layer had to be lined up correctly as the GIF would seem irregular and not flow well if it wasn't.
Once The images were all aligned I noticed that there were gaps in the water from where I had cut and pasted the image. My last layer was just water so I used the quick selection tool to cut and paste that specific shape onto each layer. This would allow it to flow smoothly. I realised that the smudging of the waves didn't flow well or give a good cartoon effect. To resolve this I decided to use the clone stamp tool and select a plain section of the water to clone over the existing wave. This created a better effect but still kept the small amount of detail in the water from the smudging. I then went over the lines again in black with the brush tool to neaten up the edges.
Once I was happy with the colour, style, size and alignment of my GIF I went to window and clicked timeline. This put each layer in a timeline which creates the GIF. It was originally quite a slow speed however I changed each layer to 0.5 seconds as this allowed my animation to flow but you can still see the image. I then clicked file, export and save to web which allows me to use my GIF successfully online.
Overall I was happy with the outcome of my GIF as I feel it flows well as one. I like the cartoon style effect however if I was to do it again I could create more shading on the dolphin to add more depth and realism.